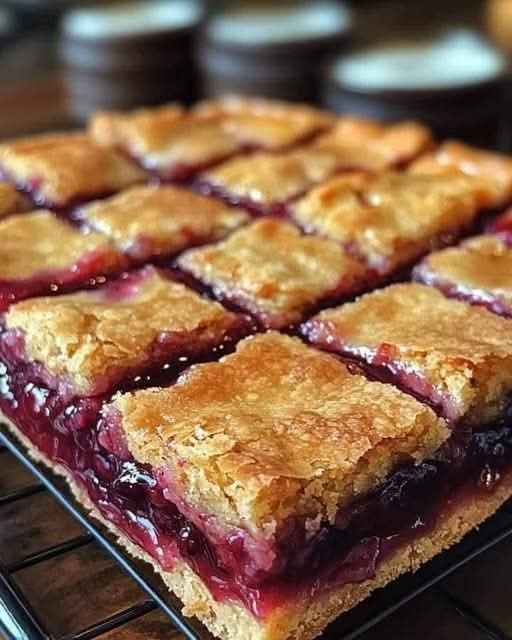
Cherry Pie Bars are the fuss-free cousin of a traditional cherry pie, offering all the luscious fruit flavor in a portable, crowd-pleasing bar form. With a buttery, tender crust that doubles as a topping and a juicy cherry filling, these bars are easy to make and perfect for potlucks, picnics, or weeknight desserts. Whether made with homemade or canned cherry pie filling, they strike the ideal balance of tart, sweet, and buttery richness—no rolling pin required.
⏱ Prep Time
- Preparation: 15 minutes
- Baking Time: 35–40 minutes
- Cooling Time: 1 hour
- Total Time: ~1 hour 55 minutes
🔧 Equipment Needed
- 9×13-inch baking pan
- Electric mixer (hand or stand)
- Mixing bowls
- Spatula
- Measuring cups and spoons
- Parchment paper (optional for easy removal)
🛒 Ingredients
For the Dough (Crust & Topping)
- 1 cup (2 sticks) unsalted butter, softened
- 1¾ cups granulated sugar
- 4 large eggs
- 1½ tsp vanilla extract
- ¼ tsp almond extract (optional but recommended)
- 3 cups all-purpose flour
- ½ tsp salt
For the Filling
- 1 (21 oz) can cherry pie filling — or about 2½ cups homemade cherry filling
Optional Glaze
- 1 cup powdered sugar
- 1–2 tbsp milk or cream
- ½ tsp vanilla or almond extract
📝 Ingredient Notes
- Butter: Room temperature is key—this gives the bars a tender, melt-in-your-mouth texture.
- Almond Extract: Enhances the cherry flavor and gives the bars a bakery-style taste.
- Cherry Pie Filling: Store-bought is easy, but you can make your own with cherries, sugar, lemon juice, and cornstarch.
- Glaze: Adds a sweet finishing touch—great for presentation and extra flavor.
👩🍳 Instructions
- Preheat the Oven:
Set oven to 350°F (175°C). Grease a 9×13-inch pan or line with parchment for easy removal. - Make the Dough:
In a large bowl, cream the butter and sugar until light and fluffy (2–3 minutes). Beat in the eggs, one at a time, then add vanilla and almond extracts. - Add Dry Ingredients:
Gradually mix in flour and salt until combined. Dough will be thick and slightly sticky. - Assemble the Base:
Spread about ⅔ of the dough evenly into the bottom of the prepared pan. Use a spatula or slightly damp hands to press it flat. - Add the Cherry Filling:
Spoon cherry pie filling over the dough layer, spreading it out evenly. - Add the Topping:
Drop remaining dough by spoonfuls over the cherry layer—it won’t cover completely and that’s okay! It creates a nice rustic look when baked. - Bake:
Bake for 35–40 minutes, or until the top is lightly golden and cooked through. The cherry filling may bubble at the edges. - Cool & Glaze:
Allow bars to cool completely in the pan. Mix powdered sugar, milk, and extract to form a glaze and drizzle over cooled bars. - Cut & Serve:
Slice into squares or bars and enjoy!
📊 Nutrition Facts (Per Bar – approx. 1 of 20 servings)
- Calories: ~220
- Carbohydrates: 31g
- Fat: 9g
- Saturated Fat: 5g
- Protein: 2g
- Sugar: 20g
- Cholesterol: 45mg
- Sodium: 70mg
Nutrition will vary slightly based on glaze and filling used.
💡 Tips
- Room Temp Ingredients: Make sure butter and eggs are room temperature for easier mixing.
- Don’t Overbake: Bake until just golden—overbaking can make the bars dry.
- Cool Completely Before Glazing: If the bars are too warm, the glaze will melt right off.
- Storage: Keep bars in an airtight container at room temp for up to 3 days, or refrigerate for up to 5.
🔄 Variations
- Homemade Cherry Filling: Use fresh or frozen cherries, sugar, lemon juice, and cornstarch to make your own.
- Mix-in Crust: Add chopped almonds, pecans, or coconut to the crust for extra texture.
- Different Fruit Fillings: Try blueberry, apple, or peach pie filling for variety.
- Gluten-Free: Use a 1:1 gluten-free baking flour to make the recipe celiac-friendly.
- Mini Versions: Make in muffin tins for individual pie bar cups.